
To clear DNS cache on Windows, you can use Command Prompt or PowerShell to remove old DNS records stored on the PC.
This can help when a website still opens an old IP address, a recent DNS change is not showing, or one computer resolves a domain differently from other devices.
If the problem continues after the flush, check the returned IP address. Then review the browser, VPN, router, DNS server, or Windows Hosts file.
Quick Answer
Open Command Prompt and run:
ipconfig /flushdnsYou can also clear DNS cache with PowerShell:
Clear-DnsClientCacheA successful DNS flush takes effect immediately. You do not normally need to restart Windows.
Video: How to Clear DNS Cache on Windows
The video below shows both methods and how to check the DNS result afterward.
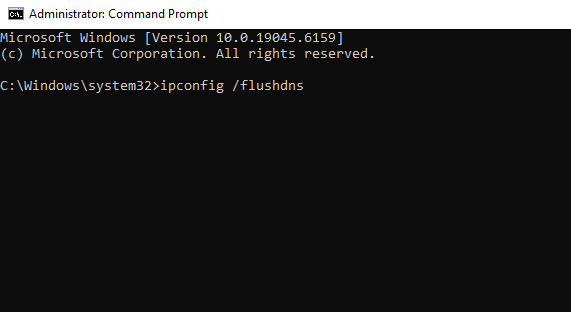
1. Flush DNS on Windows with Command Prompt
The Command Prompt method works on both Windows 10 and Windows 11.
- Press the Windows key.
- Type Command Prompt.
- If Windows requires elevation, select Run as administrator.
- Enter the command below and press Enter.
ipconfig /flushdnsWindows should display a message confirming that the DNS Resolver Cache was cleared successfully.
This command only clears DNS records stored on the local PC. It does not change your DNS server or other network settings.
Microsoft documents the command in the official ipconfig documentation.
2. Clear DNS Cache with Windows PowerShell
Windows PowerShell includes a dedicated command for clearing the DNS client cache:
Clear-DnsClientCacheOpen PowerShell, run the command, and press Enter.
PowerShell usually returns to the prompt without showing a success message. That is normal.
This method gives the same basic result as the Command Prompt method.
Microsoft provides more information in the Clear-DnsClientCache reference.
3. Verify the DNS Result
Do not assume the problem is fixed just because the cache was cleared.
Check which IP address Windows now receives.
In Command Prompt, run:
nslookup example.comOr use PowerShell:
Resolve-DnsName example.comReplace example.com with the domain you are checking.
Compare the returned address with the current IP address for the domain.
4. What If the Old IP Still Appears?
Clearing the local cache only affects the current Windows PC.
If the old address still appears, check these areas:
- Close and reopen the browser.
- Check whether a VPN or proxy uses another DNS service.
- Check your router or upstream DNS resolver.
- Review the Windows Hosts file.
- Confirm that the public DNS record was changed.
- Allow time for the old DNS record’s TTL to expire.
Check the Windows Hosts File
The Hosts file can override normal DNS lookup results.
Its default location is:
C:\Windows\System32\drivers\etc\hostsA manual entry for the affected domain can keep Windows on an old IP even after you clear the DNS cache.
See the SupportSolved Windows Hosts file guide before editing this file.
Frequently Asked Questions
Is it safe to clear DNS cache?
Yes. It does not remove personal files, apps, browser history, bookmarks, or saved passwords.
Do I need to restart Windows afterward?
No. The local cache is cleared immediately after the command succeeds.
Will flushing DNS make my internet faster?
Not normally. It can fix a stale or incorrect DNS result, but it does not increase your internet speed.
Does this work on Windows 11?
Yes. The Command Prompt and PowerShell methods work on Windows 11 and Windows 10.
Summary
To flush DNS on Windows, use Command Prompt or the dedicated PowerShell DNS client command.
After clearing the cache, verify the domain with
nslookup
or
Resolve-DnsName.
If Windows still returns the old IP, check the browser, VPN, router, DNS resolver, Hosts file, and public DNS record.
For more Windows troubleshooting articles, visit the SupportSolved Windows guides.
