Ultimate 2025 BitLocker Guide – Secure Your Windows Data Like a Pro
Windows provides a built-in full-disk encryption feature that keeps your data safe even if your device is lost or stolen. This step-by-step guide explains how to enable BitLocker, back up the recovery key, choose the right encryption options, and verify protection securely.
What Is BitLocker?
This is Microsoft’s full-disk encryption technology available in Windows Pro, Enterprise, and Education. It uses AES 128-bit or 256-bit encryption and works best with a Trusted Platform Module (TPM) chip to secure data stored on your drives.
Why Use Drive Encryption
- Prevents unauthorized access to confidential data.
- Helps organizations meet compliance standards such as GDPR and HIPAA.
- Integrated directly into Windows—no third-party software required.
- Supports operating system and removable drives through BitLocker To Go.
How to Enable BitLocker (Windows 10/11)
Before starting, make sure you are using a Windows edition that supports drive encryption. Follow the steps below to enable and configure it correctly.
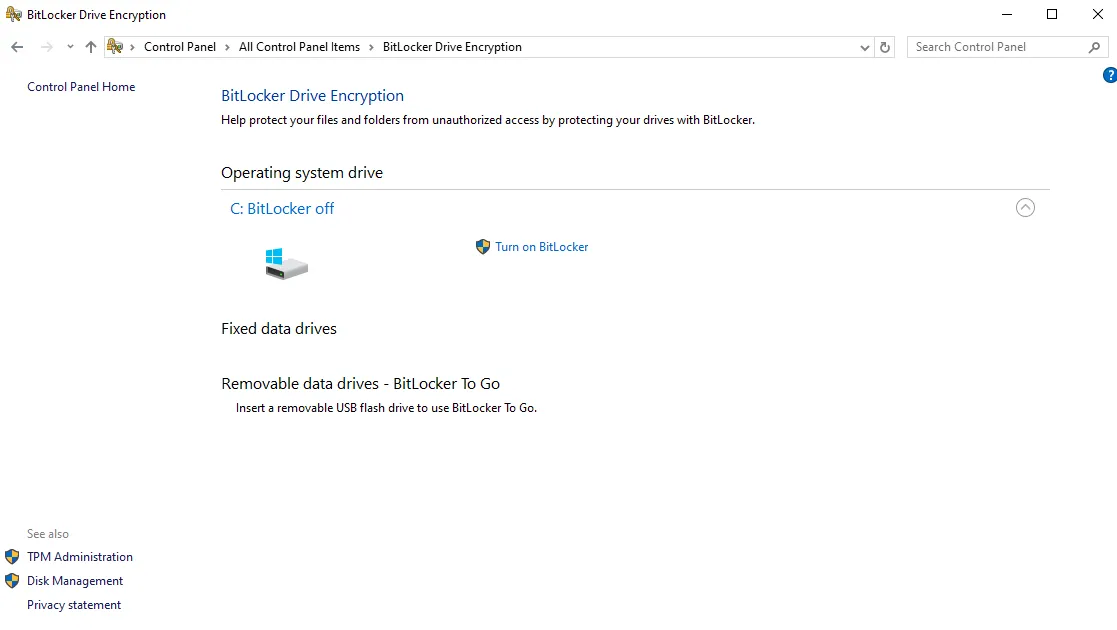
Step 1 — Open BitLocker Settings
Open Control Panel → System and Security → BitLocker Drive Encryption, or simply search Manage BitLocker from the Start menu.
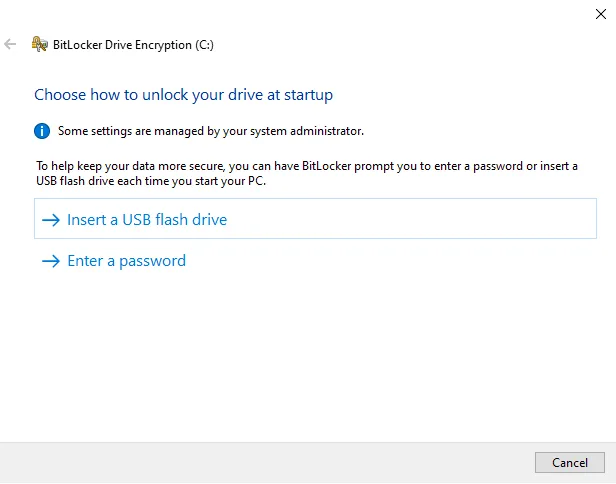
Step 2 — Choose Unlock Method
Decide how the system drive will unlock at startup. You can use a TPM + PIN, a password, or a USB key depending on your security policy.
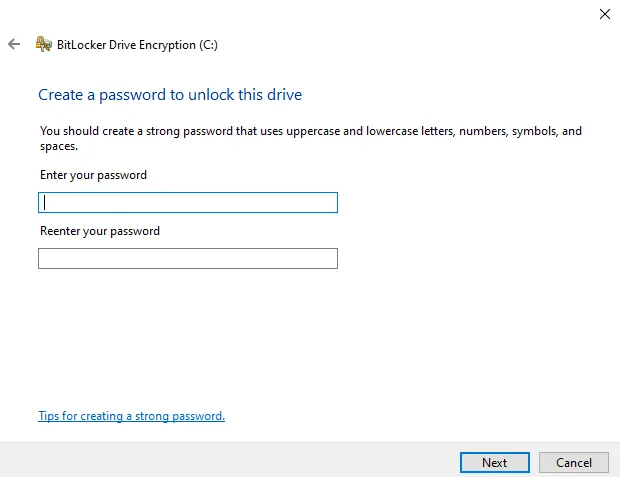
Step 3 — Create a Password
Set a strong password with uppercase, lowercase, numbers, and symbols. Avoid reusing passwords from other accounts.
Step 4 — Back Up the Recovery Key
Store your Recovery Key safely. Save it to your Microsoft account, a USB flash drive, or print it. Do not keep it only on the encrypted computer.

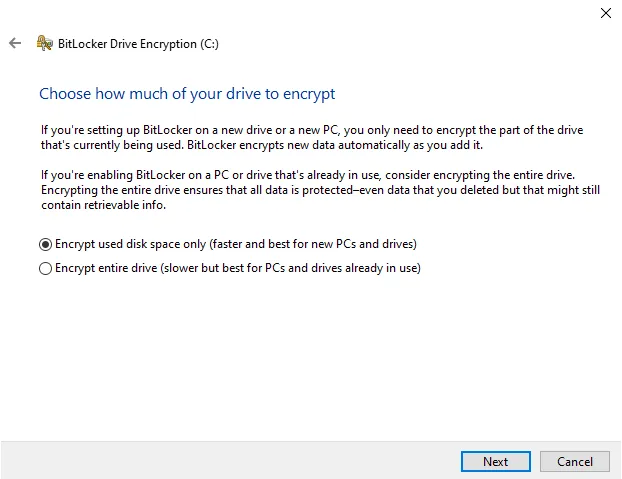
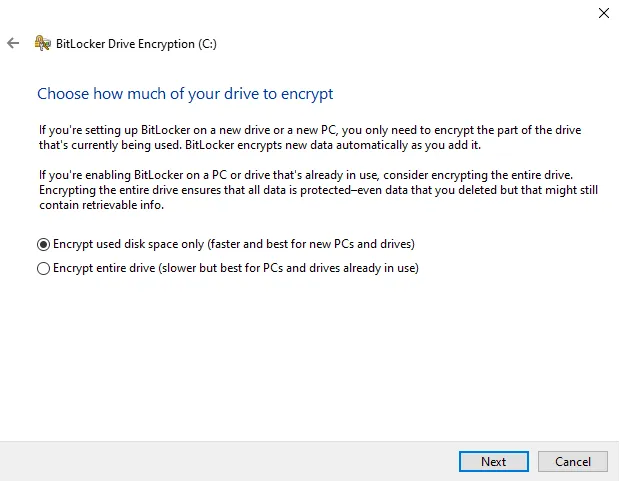
Step 5 — Choose How Much to Encrypt
- Encrypt used disk space only – faster, ideal for new PCs.
- Encrypt the entire drive – recommended for existing systems with data.
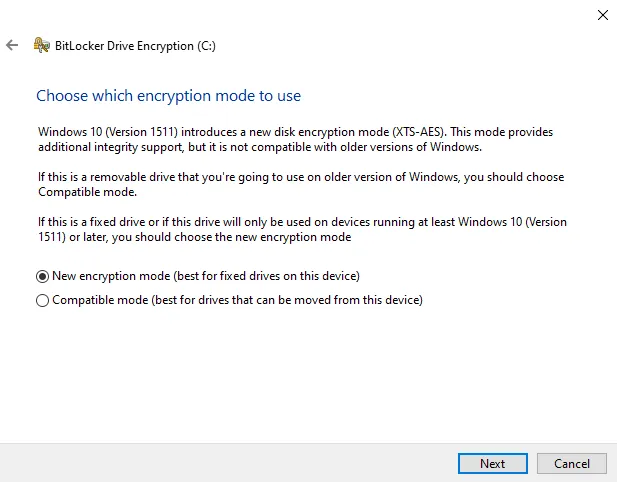
Step 6 — Select Encryption Mode
- New XTS-AES mode – best for fixed internal drives.
- Compatible mode – for drives shared with older Windows versions.
Step 7 — Ready to Encrypt
Optionally run the system check before full encryption to confirm all keys can be read. This helps prevent startup issues after reboot.
Step 8 — Start Encryption
Click Start Encrypting. You can continue using your PC while the process runs in the background.

Step 9 — Monitor Progress
The duration depends on drive size and speed. Check status anytime using the command manage-bde -status from an elevated Command Prompt.

Pros and Cons
Pros: Integrated, reliable, and simple to manage. Cons: Not available in Windows Home editions, minor performance hit on old drives, and losing the recovery key means permanent data loss.
Best Practices & Commands
- Keep multiple copies of your recovery key in safe places.
- Use TPM + PIN for added pre-boot security.
- Temporarily suspend protection before BIOS updates:
manage-bde -protectors -disable C: -RebootCount 1. - Re-enable protection after updates:
manage-bde -protectors -enable C:. - Check current status anytime:
manage-bde -status.
Helpful Resources
- Microsoft Docs — BitLocker Overview
- Learn more about Windows security configuration at SupportSolved
Conclusion
Drive encryption provides a powerful defense against unauthorized data access. With TPM, secure password policies, and a properly stored recovery key, your Windows system stays protected even if the device falls into the wrong hands.
For more Windows security tutorials, visit SupportSolved.